
If you need to open your jar to correct an overflow, it's best to do so very soon after the jar has been packed and sealed, ideally within the first one to two hours. After that initial period, avoid opening the jar unnecessarily. If fermentation is already underway, our general recommendation is to wait until at least 72 hours have passed before opening and pressing the vegetables back beneath their juices. Always work with thoroughly clean equipment and food-safe gloves when handling the vegetables.The Expanded Guide to Anaerobic Fermentation
necessary for a new person to jump in and get a batch going, and to include a few recipes on only 7 short pages.
You can view the Quick Start Guide to Traditional Old World Pickling and Anaerobic Fermentation here if you have the equipment and vegetables and you want to get started right away.
There is a proverb: “Give a man a fish and he will eat for a day. Teach a man to fish and he will feed himself and his family, and teach others to fish and feed a world.” It is our goal in this section to empower you to work from the general principles of anaerobic fermentation, and to not keep you limited to recipes.
Imagine empowering someone who has fermented a few simple batches of vegetables to take almost any fermenting recipe from any blog and convert it to create real probiotic food, understanding not only how to do it, but also why it will work. Failures are rare with The Probiotic Jar, and failures are always valuable learning experiences about the application of these basic principles.
This Expanded Guide will build from the format of the Instructions sections of the Quick Start Guide. If you choose to read this section instead of the Quick Start Guide, all that information is included here. At the bottom of each section, there are "Back" and "Next" buttons, so that you can navigate easily through, or choose from the Menu any particular section that you wish to view.
Start by washing your Jar and accessories (not sterilized), with your hands scrubbed clean (no antibacterial soap). Additionally you might use a nail brush under your fingernails. Make sure all the kitchen tools involved are clean and dry before you begin. You don’t want to introduce unwanted microbes, chlorine, or fluoride if it can be avoided.
Mixing The Brine
You will notice that recipes from other sites for fermenting and fermenting cookbooks will call for a higher amount of salt. In The Probiotic Jar, the molds and yeasts are starved for oxygen very quickly, and lower amounts of salt are sufficient to control them. When adapting recipes to use in The Probiotic Jar be sure to adjust the salt according to the types of vegetables in the ferment.
One critical principle to be aware of when the goal is true lacto-fermentation for the creation of a probiotic medicinal food is that LAB are mineral-hungry and need some salt; however, more salt inhibits them, slowing their growth, and too much salt kills them. When you use too much salt, what you end up with is a brine-cured food, which is fine if that is what you want. Many recipes on other sites and on blogs have very high salt recommendations (such as 1/2 cup salt for 2 1/2 cups water), and still call it "lacto-fermentation" but with such high levels of salt, little or no actual lacto-fermentation is going to happen. If you always mix the brine (2% or 5% depending on the vegetable type), and discard the salt recommendations in the recipes, your recipe will turn out wonderfully. Fresh herbs are a wonderful addition to a ferment. Keep in mind the other recommendations such as using only whole spices, because ground spices contribute mold. The one exception to this is for a 2 or 3 day quickly consumed ferment, when molds won't have a chance to gain a foothold, as in salsa.
Some considerations regarding this rule should be taken with some foods such as pepper mashes and lacto-fermented/preserved lemons, which require great amounts of salt to prevent mold. Most of the time a very slow lacto-fermentation is detectable during the room temperature phase, which means that the LAB are active on a low level, but not enough to consider those foods "healing, probiotic" foods.
It is critical to use properly filtered chlorine and fluoride free water. Chlorine and fluoride both kill microbes, and will not support a healthy ferment. Clean well water and fresh spring water are wonderful to use in ferments, and properly filtered city water is fine too. If your water is safe to drink, and chlorine and fluoride free, ferments will do well in it.
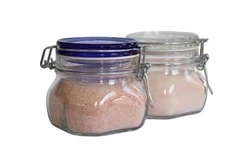
Weighing salt is the preferred method of measurement. We recommend and only use Himalayan Pink Salt. Himalayan Pink is a very dry salt, and moisture content does not greatly affect its weight. You can be confident that your brine salinity is correct using Himalayan Pink. We do not recommend Sea Salts because some sources suggest that they contain mold, which should not be introduced to the ferment.
Table salt with added iodine actually has an unnatural level of iodine that will kill the ferment. Other salts may have added flowing agents or other hidden additives, which should never be added to a ferment.
To get the concentrations right, it is important to measure out the filtered water correctly, and then weigh the salt before adding.
The mathematical calculation for mixing brine is: The volume of water in ml (which equals the weight in grams) multiplied by the strength of the brine desired (2%=.02) equals the amount of salt in grams.
To get a liter of 2% brine, fill a pitcher with 1000 ml. of water (1 liter), multiplying by .02, which equals 20, which is the amount of salt to add (in grams) to the water. Or, you could just use the handy brine chart, but isn’t it good to know how to do it?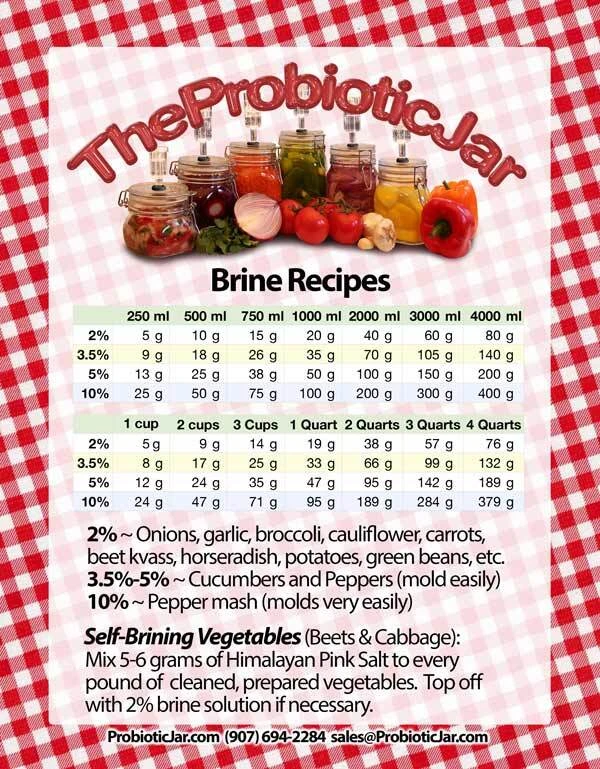
Choosing & Preparing Vegetables
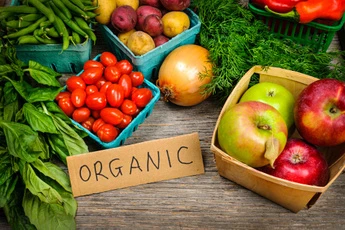
Organically grown is ideal. Vegetables sprayed with pesticides and dairy products containing residual antibiotics will have had many of the beneficial LAB killed off, thus contribute anti-microbial compounds to the ferment. It is these LAB which will do the work of fermenting the produce, and when they are compromised, the outcome of the ferment will be uncertain.
Furthermore, any non-organic vegetables may have been irradiated (especially imports), and have insufficient beneficial bacteria remaining to culture the vegetables. Adding a culture such as whey or a specific vegetable culture will not solve the problem. Enzymes that are entirely destroyed by irradiation are intrinsically necessary for fermentation. This is why one cannot lacto-ferment ketchup made from canned tomato paste: because the tomato enzymes have been destroyed.
The best sources of fresh produce are your local farmers markets, in season. Be sure to ask about potential pesticide use on vegetables that are not organically labeled that you have not personally grown.
Start your own backyard or deck garden, where you have complete control over how your vegetables are grown when possible. Purchase The Gardener’s Delight package (here), and preserve the bounty, year after year, from harvest to harvest!
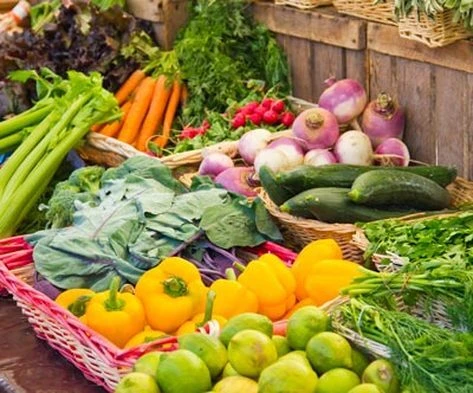
Fresh organically-grown herbs are a delightful addition to fermented foods. Dried organic spices can be used, but only whole, not ground, because mold is more prevalent in ground spices, thus increasing the risk of spoilage. Some recipes call for adding ground spices after the primary fermentation stage, and this is safe because the pH of the ferment has already dropped so much that it is an inhospitable environment for any mold in the spice to gain a foothold.
Prepare your produce, depending upon what your goals are. In the fall, if I want to store a root vegetable such as beets or carrots until next May, I’m going to scrub it, peel it (or not) depending on the condition of the skin, and pack it in the jar whole with the ends trimmed off. This will allow for a much slower ferment, potentially lengthening the amount of time a fermented vegetable will be in really peak condition. While shredded carrots and beets are delicious, the sugars are more accessible to the LAB, thus causing the fermentation process to speed up and will ferment very quickly. They do not last as long ~ even though not technically spoiled, I have noticed that sometimes my beets taste “old” after about four months. When I compare any other method of storing these vegetables into the winter, raw, with enzymes and vitamins enhanced, I simply can’t feel badly about “just four months” compared to about 10 days or so in the fridge, or the blanched enzyme-killed freezer method.Pack The Jar
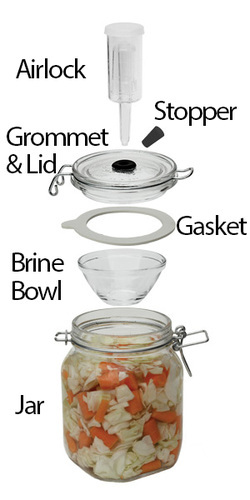
Add the brine just enough to cover the produce by about ¼ to ½ inch. As gasses are created the vegetables may expand enough to push their way into the Airlock if the Jar is overfilled into the neck area of the Jar.
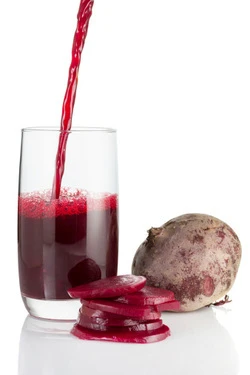
Self-brining vegetables (thinly sliced or shredded beets and cabbage) form a second category of fermentable produce. Depending upon the moisture content of these self-brining vegetables, they may not need any additional brine to keep them submerged, which is important to prevent spoilage during the early stages of fermentation. If they do need a little extra liquid as the jar is being packed, add just enough 2% brine to cover the vegetables by ¼ to ½ inch.
Vegetables poking up out of the brine will not ferment, and are not protected from spoilage by the aerobic microorganisms. Generally, small bits are easily removed with bamboo tongs, and while you are not going to get every single bit, the more you can remove, the better. Proper placement of the Brine (Submersion) Bowl may entirely eliminate this issue, except where a larger Jar size leaves more of the brine surface area exposed. Jar size and vegetable preparation are significant variables in this process; the important part is to know that you don’t want your vegetables up out of the brine when you seal the Jar.
Place the Brine Bowl on top of the vegetables and brine. It is important to allow enough headspace in the Jar that the Brine Bowl is not grinding against the lid as you close it ~ there should be a small gap between the Brine Bowl and the lid. If this is not possible, then some of the vegetables should be removed to allow enough head space in the Jar. When the Brine Bowl is optimally placed, the brine should be just below the neck, and not to the top of the Jar. The Brine Bowl will displace some of the brine; therefore, adjust the brine level so that it both covers the vegetables and the brine is not up into the neck of the Jar.
Assembling the Jar, Closing, & The Airlock
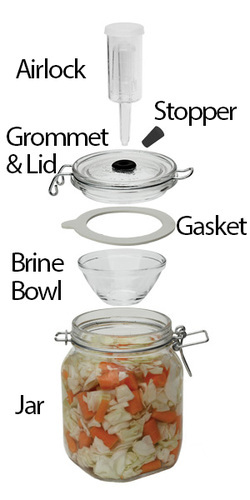
It is important not to open the jar during the room temperature phase, unless you cannot avoid it due to the gas pushing the vegetables or brine up into the Airlock. The Brine Bowl will help prevent most of this issue by creating a ceiling in the jar upon which the vegetables will be pushed, at which point additional pressure will usually cause the gasses to escape the vegetables and trickle up along the sloped sides of the Brine Bowl, and bubble out thru the Airlock.
If my vegetables started poking out during this phase, I would most likely not disturb them, and would wait to carefully remove them from the jar just before transferring the Jar to cool or cold storage.
Occasionally, brine may overflow into the Brine Bowl. If the brine both fills it up and starts up the Airlock, follow the timing guidance below before opening the Jar to remedy the situation. See our Handling Overflows Video.Important: When to Open an Overflowing Jar
Light & Temperature
Cover the Jar with a dark kitchen towel. Lactic acid-producing bacteria (LAB) (the bacteria that do the work of fermentation) flourish in the dark, and light kills them. UV Light in the amounts that penetrate the Jar seem to be beneficial to yeasts, and is to be avoided. Yeast, while not necessarily harmful, really interferes with the flavors and texture of a ferment. Wrap the Jar with a dark kitchen towel, or another light-blocking material, and set it in a location in the kitchen where the sun does not shine directly.
Be sure to keep the top of the Airlock uncovered to allow pressure to escape thru the tiny holes in the Airlock cap.
Move the Jar to cool or cold storage at the indicated time. The time frames given are a guideline. When the bubbling looks like it has stopped, it is time to move it to cooler storage. Don’t move it to cool or cold storage while the ferment is still producing bubbles; likewise, don’t leave it at room temperature much longer when no more bubbles are being created. I like to peek at my ferments a few times each day. There is something so satisfying about checking on the bubbles!
To check for bubbles, I remove the towel that covers the Jar, slide the Jar towards me on the counter, and without lifting the Jar, grasp the lid and neck of the jar (without disturbing the Airlock) and rotate the jar back and forth a few times. This jostles the vegetables just enough to loosen any trapped bubbles, which indicates that the ferment is still active. When I rotate the jar, and almost no bubbles rise, I know it is ready to move to cool/cold storage.
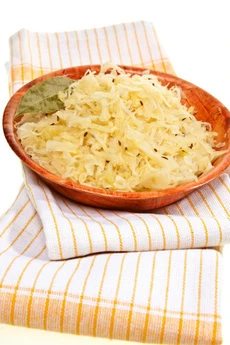
Some vegetables require additional time in cool storage to continue their fermenting at a slower pace, such as cabbage (sauerkraut), which will finish in about 6 weeks at about 55ºF, or about 12 weeks at about 38ºF.
What's Happening In The Jar
The undesirable molds and yeasts are using up what little oxygen is available in the headspace. Meanwhile, the LAB create carbon dioxide gas further displacing the oxygen by forcing it up and out of the airlock since carbon dioxide is heavier than oxygen. The molds and yeasts are then quickly suffocated.
More about yeasts, molds, and bacteria (Coming Soon)
Early in the fermenting process, a LAB species will flourish that drops the pH of the brine sharply from around neutral pH of 7.0 to below 5.0, in about the first 24 hours. Molds and yeasts are sharply inhibited by the acids, starved by lack of oxygen, and the LAB then begin to flourish. As the first LAB drops the pH in their active phase, they slow down and another LAB that thrives in the lower pH becomes much more active and flourishes, further producing lactic acids, and continuing to lower the pH. More about fermenting phases here (Coming Soon)
If acids are added to the ferment, some of the spectrum of the LAB that would naturally develop in the culture are thus bypassed. Adding whey to a ferment completely changes the spectrum, both by prematurely lowering the acid level, and then introducing foreign dairy LAB strains, which will compete with the vegetable strains and create a completely different ferment. In The Probiotic Jar(tm) it is totally unnecessary to add cultures to fresh, organic vegetables. If you are unsure of the source, freshness, or quality of the produce, it would be best to use a vegetable culture such as Caldwell’s, but these cultures will also alter the flavor of your ferments, although not leaning towards a “cheesy” taste that whey tends to add to the mixture.
While adding acids is not harmful, it is limiting to the spectrum of the naturally present LAB of the ferment. You will notice that some recipes, such as salsa, call for fresh squeezed organic lemon juice or lime juice, intentionally altering the way the ferment will proceed. Experiment! Find out what you like!
One interesting factoid about LAB is that each species works specifically on a certain type of carbohydrate, and certain specific compounds can inhibit specific LAB. It turns out that the tannic acids in grape, raspberry, and oak leaves inhibit the LAB that digest the cellulose present in vegetable cellular structure. What this means in English, is that some vegetables that naturally have a high LAB of a specific type tend to go soft during fermentation and lose their crisp “snap”. This can be prevented by placing several leaves that are high in tannins in the Jar such as grape vine leaves, oak leaves, etc. I find the chemistry of fermenting simply fascinating!
Handling Your Finished Ferments
Avoid using metal with your naturally acidic ferments. Acids react with metals, breaking them down. Regular use of metal utensils in your Jar can add a metallic taste to your ferment. Our favorite utensil is bamboo tongs. We do use metal silverware on our ferments at the dinner table, and this is the only contact our ferments have with metals.
Monitor the Airlock for evaporation. In some arid climates the water in the Airlock may evaporate, breaking the seal. In my northern climate, I check the Airlocks monthly, but in some climates, it may be necessary to check every few days. How fast water evaporates from the Airlock may also vary by the season, and by whether or not they are being stored in an auto-defrosting refrigerator.
While the ferment is in cold storage, it is still fermenting, although very slowly. Some ferments produce very little carbon dioxide during refrigeration, and others produce more. It is recommended that the Airlock be utilized in cold storage unless it is evident that there are no more gasses forming with the dome bubbler in the Airlock staying in the low position without tipping. When there are no more gasses forming, the Airlock can be removed from the grommet, and the Stopper put in its place, maintaining the seal. The Stopper will pop out of the lid if the pressure continues to build in storage, preventing breakage of the Jar. When unsure, use the Airlock.
Good? Or Not So Good? (Detecting Spoilage)

Cloudiness in the brine without mushiness or sliminess does not indicate a failed ferment. This cloudiness is normal with many vegetables, and can be expected with some, such as cucumber-dill pickles.*
Bubbling and foaming is normal for fermenting. This indicates healthy active LAB activity. Bubbling may be hard to detect, and foaming is not always present. For example, beets tend to foam, and carrots do not tend to foam. Depending on the varieties of vegetables, and temperatures, your experience will vary.
Many refrigerated ferments will last for more than a year if the lid is not opened, and then for three or four months while it is being consumed.
*We are not microbiologists, so please use this information at your own risk.
This is the end of the Expanded Guide.
Expanded Guide to Anaerobic Fermentation
In the writing of the Quick Start Guide it was so challenging to trim it down to the information that would be
Available in Salt & Accessories
For most fermenting vegetables and kvasses a 2% brine is sufficient. Carrots, asparagus, green beans, broccoli, cauliflower, whole or quartered beets, onions, garlic, horseradish, and just about any other firm vegetable you can think of, will do well with a 2% brine. Finely sliced cabbage and grated or very thinly sliced beets will create their own brine. Pickling cucumbers and peppers are very prone to mold, and require higher salinity to prevent mold: at least 3.5% up to 5% for cucumbers, and up to 10% for pepper mash.
Sea salts also tend to hold moisture, which greatly affects the weight of the salt. This can alter the actual salinity of a brine, making it too high or too low which will affect the outcome of the ferment. If the salinity is too high, the result may be a brine-cured food, which is just fine for preservation, but this is not culturing probiotic lactic acid bacteria. If the salt content is too low, the result may be a failed ferment where molds and yeasts get a foothold before the lactic acid bacteria flourish.
Generally, any firm, fresh, raw, pesticide-free vegetable is suitable for fermentation. It is always helpful to culture fresh produce in season and locally grown, whenever possible. Obviously we’re going to do this in the summer and fall as we’re harvesting, but if you’re like me, you’ll get desperate after you run low in February. The temptation to buy the grocery store organic produce in February ends with mixed results. Sometimes, it works out fine, other times, it just doesn’t ferment very well, and yet in other times, it ends in premature spoilage. I have not had a failure yet in a Probiotic Jar with truly fresh organic produce, and have even done very well with grocery store produce when fresh and in season.
Many grocery stores spray chlorinated water on their organic produce, potentially killing some of the very beneficial species which we hope to culture. If this quality of produce is all that is available, try to find out when deliveries are put out at the store, purchasing them from the box before they are treated with the chlorinated watered, thus increasing your chances for a successful ferment. In spite of the chlorinated water from the store, I have had remarkably consistent success with grocery store produce, when purchasing in season. Beets and carrots, purchased in February, have given mixed results.
Wash your fresh organic produce and depending on what your kitchen tap water is like, you might rinse it in a splash of filtered water. (Personally, we don’t have chlorinated, fluoridated water in our kitchen, so I don’t know how much a small amount of these elements affect a ferment, and I would be inclined to avoid the potential problem.)
Click Picture to Enlarge
Fill the Jar up to, but not above the start of the shoulder. Of course, do as I say, not as I do. I tend to overfill my jar, causing overflow, far too often. This can lead to problems with spoilage as the airlock can be rendered ineffective if it is not caught early enough. I manage this risk by checking on my ferments several times a day in the first three days. If you want to pack the Jar and mostly abandon it for a week, then it would be good advice to leave a sufficient headspace in the Jar ~ at least 2 ½ inches. It is also important to have the Jar at least ⅔ full, so that there is sufficient carbon dioxide released by the desirable microbes (LAB) to force the lighter oxygen out of the jar. If there is too much headspace, there will be too much oxygen feeding the undesirable microbes, and causing unsightly oxidation of the vegetables. The more headspace in your jar, the higher risk of spoilage, so the optimum level is to fill the vegetables right to the base of the shoulder.
Click Picture to Enlarge
Place the gasket on the lid, hook the lid onto the hinge of the Jar with the D-ring securing the lower band in place. Before locking the lid in place, fill the Airlock about half way with water (about two tablespoons), add the dome bubbler, and snap on the cap. Wet the tip of the Airlock, and using twisting motions gently insert it into the grommet. The tip of the Airlock should poke past the inside of the lid about ¼” (but no further), and the grommet should not turn easily in the lid, to ensure an airtight seal. Do not use other brands of Airlocks; they are not all exactly the same size and may not create a seal. Use the Airlock that came with your Jar. We have engineered the opening to the exact specifications to perfectly fit our Airlocks.
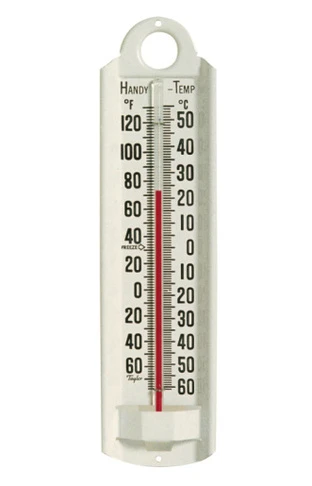
Place the Jar in a spot about 70ºF (not much above 72ºF and not much below 68ºF) and ferment for the time specified. Desirable LAB flourish optimally at about 70ºF while culturing most vegetables. Temperatures too low will slow down the fermentation process, and temperatures too high will either kill them, causing the fermentation process to proceed too quickly, and/or cause undesirable softening of the vegetable. Each species of LAB has an optimal temperature range (yogurt LAB like 105-112ºF). Follow the temperature suggestions in the recipe for optimal results.
As soon as the brine is poured on the mineral hungry LAB, they start metabolizing the minerals and carbohydrates in the vegetables. Every 20 to 30 minutes, while the LAB are active, they are doubling their numbers, until they have digested all of the carbohydrates in the Jar. That being said, LAB are “slow to get going” compared to yeasts, molds, and pathogens. That is why it makes such a significant difference to create probiotic foods in The Probiotic Jar’s(™) hermetically sealing container. We give the LAB the most optimum environment for growth, and restrict what supports the undesirable microbes, giving LAB a head start in the battle for survival that they are sure to win!
Always keep finished ferments in the fridge to avoid contamination. Only take them out long enough to remove what you’re going to use, putting them back into the fridge promptly. Keep the lid closed as much as possible. Undesirable airborne microorganisms are easily introduced to the Jar, and will flourish more readily if the temperature of the ferment rises significantly. Of course, use a clean utensil to remove the food to another serving dish, and avoid putting a potentially contaminated utensil into the Jar. Never return an unused portion to the Jar.
Generally, ferments should have a healthy sour flavor, and you will likely know by the taste when they are going “over the hill” long before there is enough spoilage to cause harm. One sign that a ferment is starting to “go” is a slight film that dulls the surface of the normally glossy brine. Of course, if there are white patches or green fuzzy patches, or the ferment otherwise looks or smells like a science project, add it to the compost pile!*